ANIMATIONS TUTORIAL
This tutorial will show the workflow for creating animations using Rhino, Grasshopper, Photoshop, Premiere, and Illustrator. These are the basic steps for making an animation, but feel free to make them as fun as you want!
EXAMPLES
Frame House User Interface Video
EXERCISE FILES
Feel free to download these exercise files below to follow along with the tutorial.
BASIC WORKFLOW
RHINOCEROS
Make a 3D model of the elements you would like to animate. Make sure each animated component is grouped together to make it easier to animate.
Find a view in Rhino for your animation and save it as a named view. Consider any overlaid AI pieces you may want to add in later! Your view should have enough white space for these elements.
Move all the components you wish to animate to their staring position. For this example, we are starting with our components out of frame and dropping them into place one by one.
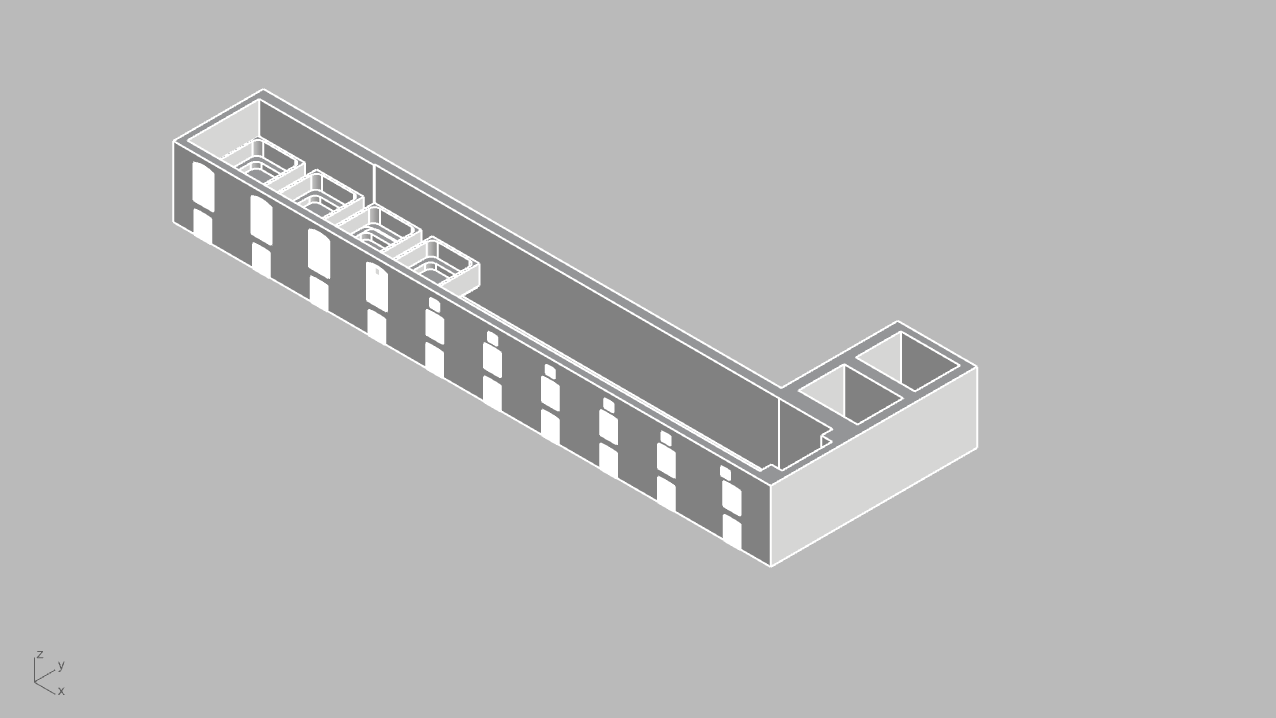
Detailed Rhino Model, Grouped by Animated Element
Animation “Start” Position
GRASSHOPPER
Once we have all of our elements set up in Rhino, we can open Grasshopper and begin to construct our animation.
Determine how each piece should move in your animation.
Create a Grasshopper script which moves each piece in the desire move path. The key thing here is to use a slider in your script which moves the element from its start position to its end position. Feel free to add a custom preview and a swatch color to your geometry to create a nicer appearance.
Note: If you are new to Grasshopper, feel free to contact us for a tailored tutorial on how to design the script. Visit the help desk at the top of this page.
Move all the components you wish to animate to their staring position. For this example, we are starting with our components out of frame and dropping them into place one by one.
Right click on the slider and select the “Animate” button to animate that specific movement. This will automatically slide the Grasshopper slider and take incremental screen shots to animate the movement. Make sure to choose the correct aspect ratio, your named view, and a location for these animated images. Also, be sure to specify the number of images you would like. The more images you have, the smoother the movement will be.
Repeat step 4 for every animation movement you want.
At the end of animating each step, you should have many individual images which make up the animation movement. In the next step, we will learn how to stitch these together.
Grasshopper script to move each component from its start position to end position. Four scripts for four comopoents
Animation Panel Key Settings
PHOTOSHOP
Once we have all of our images, we can weave them together in Photoshop. We can also use a GIF maker, but Photoshop will provide better resolution.
Open a photoshop file and add each of your images as a separate layer. Each layer should be in order (the first frame is at the bottom and the last frame is at the top). Note: Do this in small chunks (about 50 images or less). Your file will be slow if you add all of your images all together!
Go to Windows > Timeline. The timeline editor panel should appear at the bottom.
Click the create animation (appears in the middle of the timeline panel)
Click on the three horizontal lines at the to corner of the timeline panel and select “ Make Frames from Layers”. This will take each individual layer and create a frame.
Select all of the created frames and use the drop down arrow on the individual frames to change the duration of each one. A standard duration may be 0.1 seconds to start with. We can always speed up or slow down the video in Premiere.
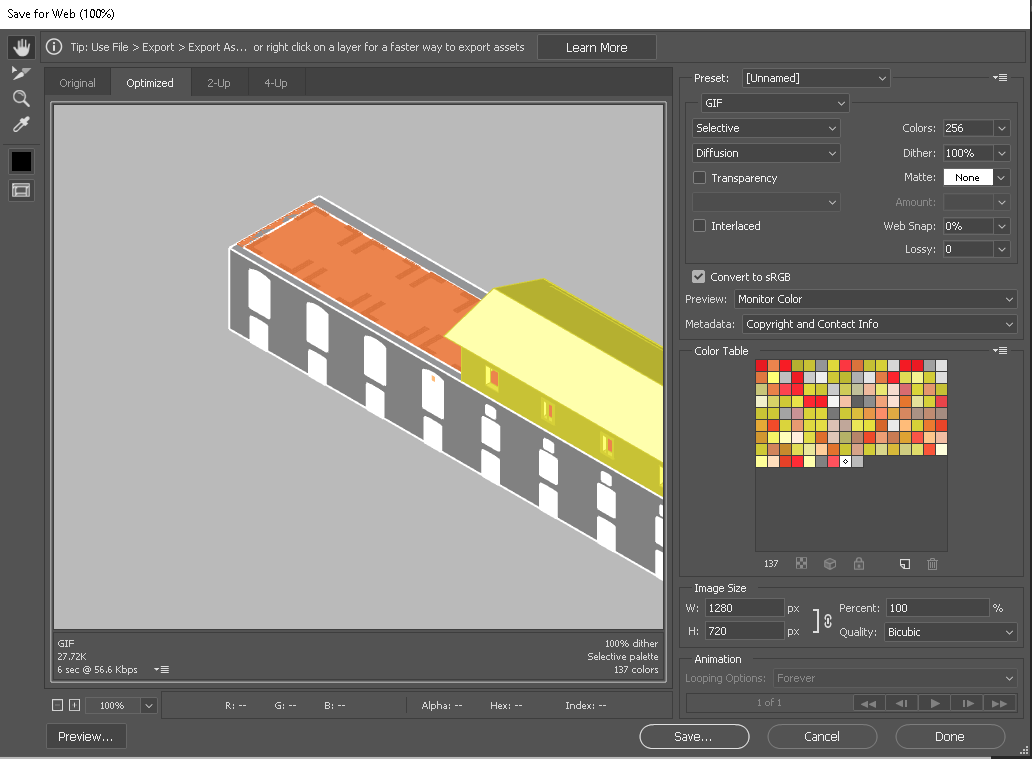
Once you are happy with the speed and order, go to File> Export> Save for Web.
Select the GIF option in the export pop-up window. Also make sure that “Matte” is set to none or black, your aspect ratio is correct for your animation size, and you choose a location for the GIF to save to.
Repeat steps 1-7 for each group of photos you have until every image is stitched together. You should have one GIF for each time you repeat the steps.
All images in separate layers and photoshop timeline below showing every frame.
Photoshop Export Menu Key Settings
ILLUSTRATOR
Once we have our GIFs, we can also create any overlays we need, if any. These will go overtop of our video as it is playing.
Open one key image from your animation in Illustrator. This will be used to obtain the right artboard size and help us determine where to design our overlays.
Design the overlay in Illustrator in a separate layer above your base image. Create one image for every different overlay you would like to use in the animation.
Save each overlay image as a .png. Note: Make sure you hide the base image and use a transparent background for the exported image!
AI overlay with transparent background
PREMIERE
Now we can stitch together all of our images and overlays in Premiere.
Open a new Premiere file and drop in your GIFs and overlays in the media browser.
Drag and drop your clips to the V1 section on your timeline. Drag and drop your overlays to the V2 section on your timeline.
Note: Your AI overlays may come in too large to see them. Right click on them and select “Scale to Frame Size”
Note: If you are new to Premiere, feel free to contact us for a tailored tutorial. Visit the help desk to request one
Organize the flow of your video however you would like. Consider adjusting the speed of the clips, adding transitions, adding sound, etc. to create a specific mood for your animation.
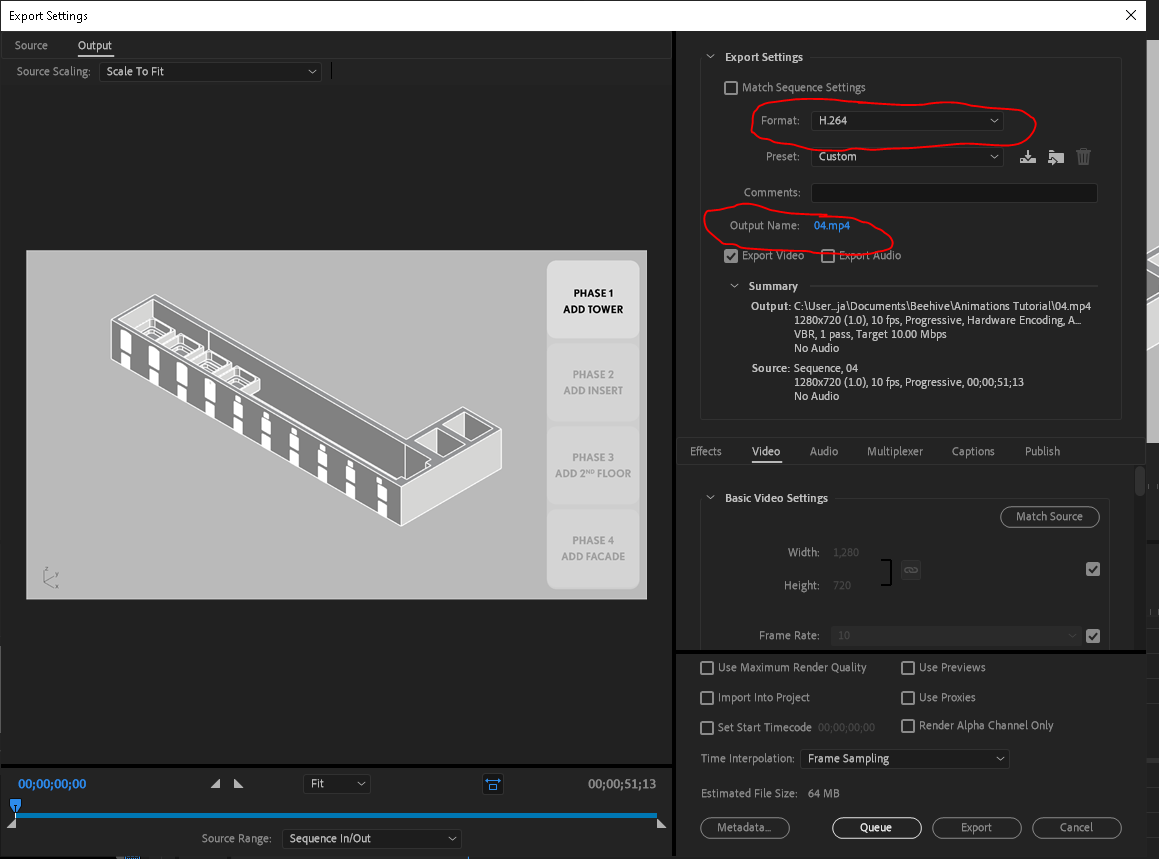
Export your video. File> Export> Media. Choose the “H264” type of video and select the proper save location.
Premiere Workspace with video laid out on timeline
Premiere Export Menu Key Settings


